Dishonored: Death of the Outsider - where to find and how to open all safes. Codes for safes in Dishonored: Death of the Outsider in the bank vault
When completing the third mission, you will be able to get into a bank vault, where you will find several locked safes. They are equipped with ingenious Jindosh locks, which are quite difficult to break on your own. You'll have to think hard to understand what combinations are required to open them. We decided to make things a little easier for you and have prepared a detailed guide on how to crack Jindosh locks. For those who don't want to waste their time, we have also written codes for all the safes in Dishonored: Death of the Outsider located in the bank vault at the end of the article.
How to crack Jindosh locks on safes: Fibonacci numbers
The first thing to note is that to solve this puzzle you will first need to understand how Fibonacci numbers work. The latter refers to the elements of a sequence where the first two digits are equal to either 0 and 1, or 1 and 1, and the subsequent ones are equal to the sum of the two previous numbers.
What does this have to do with the game? The fact is that on the board, which can be found not far from the safes, the first numbers of the Fibonacci sequence are written: 0, 1, 1, 2, 3, 5, 8, 13.
Calculating combinations for safes
Using the rules of Fibonacci numbers, we find the following:
- 1 + 1 = 2
- 1 + 2 = 3
- 2 + 3 = 5
- 3 + 5 = 8
- 5 + 8 = 13
There are 6 safes in the vault that need to be opened. If you count them as regular safes, then you will need 18 digits (6x3). Since you only have 8 digits, you will have to find the remaining 10 yourself.
Using the rules of Fibonacci numbers again, we get the following sequence: 0, 1, 1, 2, 3, 5, 8, 13, 21, 34, 55, 89, 144.
To open all safes, simply compose three-digit codes of the above sequence:
- 1 safe – 011
- 2 safe – 235
- 3 safe – 813
- 4 safe – 213 (you can skip this one as it has different locks)
- 5 safe – 455
- 6 safe – 891
You can find many valuable things in these safes. We hope you found our guide useful.
The passage is oriented towards the stealth mode.
Task 1 - Last fight
Let's watch the introductory video about Billy Lurk - the main character of this add-on
At the beginning of the game, we become familiar with a new type of task - Contracts, these are essentially the same side quests that can be completed. Some are simple, some are complex, so their passage will be described below. In order to familiarize yourself with the contracts for each location, you will need to visit the black market; it will always be marked on the map. In the first mission, the contracts will be on Billy's desk. By completing contracts, you can immediately forget about the bloodless passage of the game; you definitely won’t get this achievement.
We leave the cabin, examine the board in search of information about Daud’s whereabouts. There is also a mention on the board about the Eyeless Gang Club. They have black magic, so Daud might be involved in this. After examining the board, we climb onto the deck. And "Fallen House" has changed a lot. We go to the marker in the building, go upstairs and get into the carriage. The next point of arrival is the Albarka baths.
We approach the sealed opening, get rid of the boards and enter the next room. We go out into the street, remove the first guard, go through the gate to the stairs leading down to the tracks. There are two guards standing next to them. We get rid of them after they finish speaking and disperse.
Safe
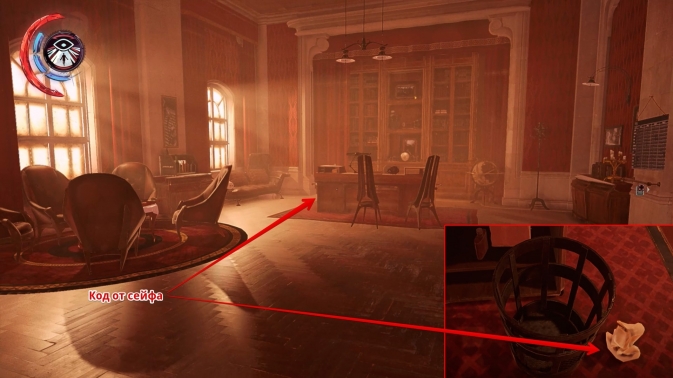
There is only a safe in this mission and it is located in the apartment opposite the Albarki bathhouse building. You can get inside through the window on the side of the tracks, by climbing up, where two guards stand, or through the main entrance, the key to the door can be found nearby in a bucket. In the baths we search the bookmaker to get the key to the safe (451).
In front of the building you can climb up the pipes on the left into the apartment. Behind the building are the Albarka baths. Having entered inside, we go down the stairs and find Daud. They force him to fight. We need to get him out. We go into the showers and climb up through the pipes. We turn off the steam pressure with the valve and climb into the opening. We go left, the first door is blocked, but then there is another one. There we again turn left, remove one girl and go out into the room with suspended guards. Climbing higher, through the ventilation you can look at the enclosure with wolfhounds. We go out and open the door nearby. We knock out two guards, take the key to the device from the body of leader Janet Lee and inspect the enclosure. 
Contracts
Burn the white dog
We mark with a marker and move towards the goal. There will be two regular and one white wolfhound in the enclosure. We open the door using the red button on the wall, stun/kill all the dogs, grab the white one and leave the room to the left. We go to the right along the corridor, at the end, near the stairs that lead down, there will be a stove where you need to throw the dog.
Industrial espionage
We head to the room. We select the recipe in the desk drawer and break all the bottles.
We leave the bathhouse building. There are guards walking around everywhere, you shouldn't catch their eye. We get to the crew and leave the location.
Task 2 - Following the ink trail
After talking with Daud, go to the carriage and go to the city - Upper Kiria. Having moved to the place, jump onto the security booth, and then onto the high fence, so you will find yourself in a protected area. Your task is to enter the Camellia beauty salon, it is located on the right side. You can't get inside through the door, but there is a passage around the corner. Here, eliminate the enemy in any way convenient for you and enter the building. There is a maid wandering inside who has the key to the beauty salon, stun her and take the key (now the front door is open for you). Go to the office (back room) and read the visitor record book on the table. After this, you will have two main targets - Shan Yuan and Ivan Jacobi.
Shan Yuan
Once inside the house, you are free to do as you see fit. Going ahead and killing everyone is quite difficult due to the large number of enemies and traps. Or take a more secretive route - a little longer than the previous option, but will reduce the number of unnecessary victims.

The first step is to find the key to the room with the elevator, which is located on the second floor. Inside this room is a device that you need to remove the battery from, which will disable the electrical traps on the floor of the adjacent exhibition booth room. Behind the glass of one of these stands there is a piece of paper with audiogram- which serves as the key to the safe on the third floor. The safe is located behind the cabinet, and to open it you need to use an audiogram on the player located here. And toThe key to the room with the elevator (with the batteries is on the third floor in Shan Yuan's office). Your goal is Shan Yuan is in the office, it’s up to you to kill him or spare him. Having receiveddocuments, leave the house.
Ivan Jacobi
Go to the marked place, try to get inside, the door will be closed. Read the note on the doors, and then run to the square where Ivan is now. He will be surrounded by soldiers, and you need to get his key. What to do is again up to you. You can just kill everyone or hide and steal the key.

You need the key in order to get into the apartment, where you need to pick up a note and a blade in the office. Having obtained them, you can now return to the “Fallen Angel” and begin a new task. Or you can investigate the crime and find evidence that proves Ivan Jacobi's guilt.To do this, open the picture,hanging on the wall behind the table and from the safe, take out a bottle of blood and a note. Take this bottle to the journalist who is located in the square in front of the bank. Now you can return to "Fallen Angel".
You can also be poisoned by fulfilling contracts.
Contracts
Death to mimu
To activate it, follow the dotted marker, which will lead you to the black market - here it is better to take on someone else’s appearance so as not to be seen by enemies and so you can freely explore the area. Approach the marked target - the mime. He is surrounded by a crowd of people, so it will not be possible to act openly. Opposite it there is a passage that will lead to the stairs, and on the left is a shop where they sell insects. Steal the key from the owner of this shop and go down to the basement. Disarm the mine on the steps. By going downstairs you can free the prisoner and take a bottle of chloroform on the table. Now return to the mime and throw this bottle at him, so as to catch the people standing nearby. Take the mime's body and go down to the dam. Throw it down so that it falls under the platinum itself, otherwise the task will fail.
Lost Brother And Bartender kidnapping
These contracts are executed simultaneously. First of all, while in the beauty salon, near the table where you read the journal, use the tattoo device to apply the Eyeless Tattoo.

After this, go to the place where the contract marker points. Knock on the door and show your tattoo to get in. The brother is on the top floor, but it's better to take care of the bartender first. You can stun everyone one by one and then take care of the bartender, or take a bottle of chloroform on the top floor and throw it into the crowd of people. Or enter into an open battle with everyone and stun him during a duel with the bartender. Once you have the bartender, take him to the marked location. Do the same with Alberto (the missing brother).
Threats at work
You will receive this contract a little later after completing the second task. Having received it, go to the indicated place - the bank. You need to eavesdrop on a woman's conversation. To do this, quietly pursue her until she stops near people. When they finish talking you will just need to kill them all.
Task 3 - Bank robbery
Go up to the deck, talk to Daud and go to the crew to go to the city. Go topharmacy, but there will be nothing there, so return to the place where you came from. Going down the stairs (which leads to the pier), look at the top - there will be a balcony. Move there and talk to the girl. From her you will learn that poppy tincture will soon be sold at auction (a very useful item that will come in handy in a jar).

Follow the marker to the auction. Here it is better to disguise yourself as someone to avoid detection. At the auction, sit in an empty seat. Buy the poppy tincture - you will have to pay 440 coins (on the black market it costs 800 coins). Thanks to it, you will be able to put all bank employees to sleep, which will greatly simplify its passage. You can go to the black market and take contracts or go straight to the bank. To get inside the bank, visit the orderly's house - you can teleport there. Examine the room and find a note on the table, from it you will learn about the cliff, which is located to the right of the central entrance to the bank. But first you need to put everyone to sleep, to do this, go leftfrom the main entrance. Here in a small courtyard there will be a device for filling glass flasks. Insert the flask into this device and pull the lever, and then take the battery closer to the cliff from which the orderly fell.

Insert the battery into the mechanism located here to call a construction cradle and hide, because the guards will come running here. When they leave, stand in the cradle and go upstairs. Use teleportation to move to the roof of the bank. Here, eliminate several enemies, and then pour poppy tincture into the ventilation system. This is also where the simple entrance to the bank is located. Because of your actions, all the people in the bank are sleeping, but not the robots - remember this. Also move carefully, if you catch any of the sleeping ones, they will begin to wake up, which will lead to the failure of two contracts. From the top floor, go down one tier, where the guard lies. Go through the door and go to the far door, further along the corridor make your way into another room. Then jump over the railing, but only using teleportation so as not to take unnecessary damage.
On the first floor of the bank, use the device - press the red button to open all the metal doors. Go outside, go down to the first floor and go through the opened metal doors in the direction of the bank courtyard.
Attention! In the nearby corridor there are two electrical installations that will kill you with one shot if you get into their line of sight. PTherefore, go to this place through the doorway, which is located to the left. Go there and stand between two screens, moving to the corridor opposite, use teleportation. Next, go through the doors on the right and left and take out the cans of liquid to disarm the traps. After this, you can safely enter the bank's courtyard.
There is another obstacle here in the form of several guard robots. Now is the time to deal with contracts ( see below). Firstyou need to turn off the electrical barrier blocking your path to the right. When one robot goes to the left, go past the barrier down the steps, go into the room (a wire leads here). Here, pull out the jar of liquid to disable the barrier. Then, go up and go to the elevator. You can go up or down the steps. It's better not to use the elevator, because the robot will notice you. Go downstairs. Now it’s better to turn off the electricity on the floor; to do this, look from the corridor to the end of the room, there you will find another overturned cabinet. Move to it and open the shield, by pulling out the can you will turn off the electricity and be able to move freely on the floor. WITHreturn to the safes on the right, where the sleeping captain lies. Search him and take him away note, which you will need to get the password to access the storage control panel.
Return to the elevator and take it to the top floor to the director's office. Do not exit the elevator, teleport to the roof of the cabin, through the hole at the top. After this, move into the open ventilation shaft, and from there - behind the wall two meters away. Then teleport to the shield, quickly open it and take out the can. When you succeed, you will neutralize the installation. In the box on the right you can find note and a lever for the storage brake. Return to the elevator and go to the director's office. In the office, go to the table and activate the hidden button to open the safe - from it you will get notes and a vault control key. After that, follow the marker which will lead youto the storage control panel. Here, ininteract with the microphone and call the guard password from the note you found on the captain's body. Next, go through the opened door and teleport along the top to avoid the barriers.

Once in the room, take out the jar of liquid that is located behind the sleeping maid. Now there is no electricity, follow the marker and interact with the control panel. First, click on the top button to move the vault to the director's office. This way you will gather all the guards in the bank director's office. By pressing the button, hide in the far room. To prevent the guards from noticing you, when the commotion subsides, press the bottom button so that the vault lowers into the area with the safes. Go there, open the vault on the right and find a safe with two keyholes. You received the necessary keys in the previous task. Take the blade with two blades.

Contracts
Two contracts are executed before entering the bank building, and the remaining two are already inside.
Art connoisseur
At the pier, approach the courier's boat. When one of the guards leaves, stun the one who remains. Here you will see two people - one of them will soon leave, and the other will remain to guard the courier boat.

You will have to kill him or stun him. After this, you need to find the key, which is on the courier's corpse. The body is underwater, so dive into the water and inspect the area under the boat. After searching the corpse you will find the necessary key. Now you can open the door and take away the contents of the room, namely the painting.
Pickpocket's Happiness
Go to the bank yard, which is well guarded. Here you need to steal a note from an elite guard. To fulfill the contract, transform into one of the guards and quietly steal the note. After that, leave and do not touch anyone, so as not to fail the contract.
From rags to riches and back to rags again
Once you are already in the bank courtyard next to the vault, go down the steps to the safes. Here you need to find the journalist's safe. Find the safe you need named Luigi Galvani.

The floor below will have electrical traps. To avoid them, move to the fallen cabinet near the steps, and then jump into the corridor on the left; this can be done using teleportation. Open Morgan Yu's safe by entering password 315, and take the gem.
Quieter than water, below the grass
Pre-purchase poppy tincture for 400 coins, which will greatly simplify the passage of the bank and the completion of this contract. All you need to do is copy the address book, which is located in the director's office (the story mission will take you there).
Task 4 - Stolen Archive
In this task, you just need to follow the main goal marker, examining the places of interest to you. So you will find yourself in the office at the very top, where you have already been while playing the original game. Here you need to kill the blind sisters again and steal the documents.

This task is quite simple to complete and does not require unnecessary explanation. There are enough obvious secret paths here to act silently and not so many enemies to act openly. Once you have the documents, view them on the projector, pick them up and leave the area or grab the contracts.

You can also try to save Lonnie. To do this, at the very beginning of the task, talk to Courtney below. From her you will learn that her lover went to the red building. Get there using teleportation, climb onto the balcony and search the rooms. Having found a corpse, search it and take the ring. After that, return to Courtney to complete this task.
Contracts
Alberto and the Abbey
After killing the sisters, find Cardozo - he will be at the very top in front of the office. Stun him, and then go down to the basement with him and put the enemy in the torture chair. After leaving the location you will complete the contract.
Rosen's Prophecies
At the top, having met the first Sister, killed or stunned, examine the corpse in the elevator shaft on the left. After that, jump into the elevator itself through the hole in the ceiling and take the book with prophecies.
Dangerous bet
At the beginning of the location, follow the marker, moving from the steps to the metal tower, and from there climb onto the balcony. There are many traps waiting for you here, so don't rush. After disarming the traps or bypassing them, take the desired item from the safe.
Task 5 - There is a gaping hole in the world
In this task you have to resolve the issue with the Alien, kill him or save him - it’s up to you. Head to the North Shindarey mines. Hidden inside is a secret gap between the worlds, the real and the abyss. Invade the Alien's possessions and eliminate him. At first glance, the location may seem large, but in reality this is not entirely true. Enemies are arranged in groups, and there are many rooms in which you can find amulets.

Having studied the beginning of the location, move alongtunnel into the park with the statue, where you will meet the dogs and the first cultists. As soon as they see you they will immediately attack - try to avoid them.In the courtyard ahead you will come across a locked door with a combination lock. Turn away from it and go into the room on the left side, then go up the stairs and find a passage above the partition. Teleport there, behind the wall on the table you can take a note with the code for the door - it always changes, so it’s better to find it while playing the game yourself and enter the code to open the door. Having walked a little further forward, you will again run intolocked door, closed gate can be opened using the red valve. After turning it, quickly run under the gate before it closes back. Run further along the mine, use the overturned trolley to get to the other side. The further you advance, the more cultists will encounter you. Inside the building, you need to find a locked door that requires a key - it is necessary for the good ending, so remember where it is.

After going through the mine you will reach the Abyss, to get there use the Eye of the Dead God. In the cave hall,go up the steps and use teleportation to get to the other side. Reach the eye by rock jumping and interact with it.
After moving into the Abyss, search the corpse that is chained to the rock to your left - this will give you key from a locked door. Now move along the slightly changed location further to the locked door (which you had to remember). Indoors, examine the box - code from the box - 962
. After opening it, read the note, this way you will find out how you can save the Alien and get a good ending.
Go to the marker and move toRitual stronghold. Just go forward, where you will meet the Alien - interact with him.

Here you will need to decide to kill him or spare him - it's up to you. In the second case, you will have to convince Daud several times that he still needs to be saved. Having chosen the ending, you just have to watch the final video.
This completes the walkthrough on the site!
There are a total of 12 locked safes and 1 door hidden throughout Karnaca in Dishonored: Death of the Outsider. Each safe is securely protected with a combination lock. Combinations and codes for locks are indicated in notes scattered throughout locations or hidden in secluded places. Safes most often store various valuables: amulets, keys, notes with important information, gold bars, coins... Almost all safes are associated with main and secondary tasks. After finding the combination, all you have to do is enter the required numbers, open the lock and take the contents of the safe. If you leave the location immediately after completing the main mission, then it will be impossible to return back in the future, so it is advisable to complete all tasks at once. For breaking all the safes in the Michaels Bank vault, you will be awarded the "Bugmaster Perfectionist" achievement.
Codes for safes in Dishonored: Death of the Outsider:
- The code for the safe in the first mission "The Last Stand"
- The safe is in a neutral room on the second floor of the house above the train tunnel at the beginning of the level. You can get into the apartment through a half-open window using the “Move” skill. There are 400 coins inside the safe. Lock code: 451 .
- Codes for safes in the second mission “Following the Ink Trail”
- Shan Yun's safe opens with a voice recording of an opera singer, which can be obtained in two ways: the first is to take the form of Shan Yun using the Likeness skill, then go to the microphone and hum the melody, the second is to go down to the gallery on the second floor of the house and pick it up from the glass box an audiogram that can be played on the audiophone next to the safe. Inside Shan Yun's safe is the key to the Eyeless' safe deposit box in the Michaels Bank vault. Where does the heroine go in the third chapter?
- Combination from reporter Christopher George's safe: 875 (subject to change). The exact code is reported by Christopher George after delivering the evidence against Ivan Jacobi, which is hidden in a hiding place behind a painting in the district administrator's office. Ivan Jacobi prepares a speech at Colibron Plaza in northwestern Upper Kyria.
- Code for the locked door on the Black Market: 398 . You can get to the room with the clue through a rat hole using the “Foresight” skill. The hole is hidden behind a billboard between the notice board and the merchant.
- Codes for safes in the third mission "Bank Robbery"
- Codes for safes in the Michaels Bank vault:
- 1 safe - 011
- 2 safe - 235
- 3 safe - 813
- 5 safe - 455
- 6 safe - 891 .
- Combinations from safe deposit boxes in the basement of Michaels Bank:
- Christopher George's safe: code - 379 (journalist's notes).
- Morgan U's safe: combination - 315 (gem from the Rags to Riches to Rags contract).
- Safe Luigi Galvani: code to the lock - 287 .
- Codes for safes in the Michaels Bank vault:
- The code for the safe in the fifth mission “There is a gaping hole in the world”
- Safe Malchiodi: 962 . The body with the key, which activates the secondary task of inspecting the cell, lies at the end of the mines near the stronghold and the Eye. A clue with a code is drawn among the symbols on the wall next to the safe.
October 10, 2017 17:53
As Billie Lurk in Dishonored: Death of the Outsider, you'll occasionally come across other characters' safes, which may contain valuables such as amulets or coins. In this article, we will tell you where the safes are located, where to look for the code for the safes, and what you can find in them.
Mission 1 "The Last Stand"
Safe in Bookmaker's apartment
During the first mission, “The Last Stand,” you will encounter only one safe. He is in the bookmaker's apartment. You can get into it in several ways. The first is to climb through the windows. When you arrive in the Northern Campo Seta area at the carriage station and reach the stairs leading down, the office windows will be at your eye level. Climb through the pipes on the left onto the balcony, and then through the open window and the safe will be in front of you.
The second way is to enter the bookmaker's apartment from the main door. It is located in the house opposite the Albarka bathhouse, and the key to it lies in a bucket standing on the bottom shelf of the rack near the entrance to the apartment. This is written in a note hanging on the belt of the bookmaker, whom you will find in the Albarka bathhouse. The same note indicates where to look for the code to the safe. To open the safe, look at the bookshelf above the bookmaker's table and count the books. This is the combination for the safe. Inside you will find a decent amount of coins and Sokolov's elixir, which restores health.

Mission 2 "Following the Ink Trail"
Shan Yun's Safe
Shan Yun's house, where you need to go on assignment, is located next to the Spector club. There are several ways to get inside. The first is to find out the secret knock of Shan Yun's beloved, Mrs. Eolina Rey. To do this, you will have to visit her apartment above the flower shop, which is located opposite the Red Camellia beauty salon, and read the letter lying on Eolina’s desk. The second way is to go through the passage leading from Spector's club straight to Shan Yun's house. The passage is located on the top floor of the club.
Shan Yun's safe is located on the third floor of the house in the office-library. The safe opens with a musical audiogram featuring the owner's song. You will find it in one of the display cases in the hall with Shan Yun's private collection, which is located on the second floor. The door there is not locked, but there is a security system on the floor.

The protective system can be disabled by removing the blubber tank in the dumbwaiter room next door. But here too you will need a key to the room. It can be obtained from Shan Yun's desk, which is located in his bedroom on the third floor. Or you can enter the room by taking the dumbwaiter from the first floor or descending from the third.

Having completed all these steps, feel free to take the audiogram “Undo your braids, Gloriana” from the display case and run to the audiograph, which is located not far from the safe. Play this song on it and you can take all the contents of the safe. Inside you will find: Shan Yun's key, which is necessary for the task, a bone amulet (read about where to look for the rest), as well as charges and coins.
Safe in a journalist's office
If you carefully examined Ivan Jacobi's office, you should have found a letter on the table about the journalist Christopher George. After reading it, you will activate an additional task related to the evidence against Jacobi, which you will find behind the painting in Jacobi’s office. Take what you found to the journalist, and in return he will tell you the code to his safe installed in his office. You will find coins in it.

Mission 3 "Bank Robbery"
Safes in the bank archives
On the -1st floor of the courtyard of the Michaels Loans and Deposits bank there is an archive and several safes of the bank's clients. You can open three of them, belonging to Christopher George, Dr. Galvani and Morgan Yu (a cool Easter egg for the game Prey). On the way to the safes you should beware of the sentry soldier and the electrical protection on the floor. Both the soldier and the defense can be bypassed at the top.

Christopher George safe code
The code to Christopher George's safe can be found in the note "In the event of my death." You will find it in the bank employee's office, located on the top floor near the conference room. If you entered the bank from the roof, then simply go down to the top floor and go to the end. The note lies crumpled on the floor near the trash can. My note said combination 379, but it's likely yours might be different. Unfortunately, you won't find anything valuable inside the safe.
Morgan Yu safe code
Opening this safe is necessary to complete the Rags to Riches and Rags Again job, as you need to steal the gem from it. The code for the safe is encrypted in the task for the contract itself. The combination of numbers matches the number of coins the owner had when he arrived in Karnaca. My number is 315, but perhaps it changes for each player. If you have the same, then write about it in the comments to this article. You will receive 500 coins for the contents of the safe, as you complete the contract.
Code to Dr. Galvani's safe
On the ground floor of the bank's courtyard, where the guard walks around and there is a light wall, there is a work area for bank employees with numerous tables. In this area there is a separate office located directly behind the storage shaft, in which on the table you will find a note "Announcement to Employees about Dr. Galvani." This note will contain a key clue to the digital combination from Galvani's safe - this is the most important date in his life. You can find out what this date is from the book “Memoirs of Doctor Galvani,” which quite often comes across in Upper Kyria. It indicates the date - the 28th of the cold month. Considering that the cold month is the 7th, the code for the safe is 287. In Dr. Galvani's safe you will find 3 gold bars, which equals 450 coins.

Safes in a bank vault
On the task “Bank Robbery” you need to rob a bank vault, for which you only need to gain access to it, and you already have the keys for the required safe, found in the previous mission. But there are still safes in the vault that can be opened. To begin with, your assignment requires you to infiltrate the storage control center and move the storage elevator to the director’s office on the third floor or to the archive on the minus first floor. Next, you need a vault key. You will find it in Dolores Michaels' hiding place, in her office. It is hidden behind a huge painting and is opened by a button located on the desk. It lies next to the amulet.

To open all the vault safes, you need to set a 15-digit code, and all safes will open at the same time. You can find the first part of the sequence of numbers in the back room on the third floor of the main part of the bank, that is, the one you came to initially, not the courtyard. The clue is written on the board. It follows from it that each subsequent number is the sum of the previous two, but do not forget that there are 6 safes, which means the sequence must be 18 digits, three of which we must skip, since the 4th safe is opened with keys. We have 9 digits for the first three safes: 0, 1, 1, 2, 3, 5, 8, 13, and continue them for the rest: 21, 34, 55, 89, 1(44) - we won’t need the last two digits . As a result, we get the following codes for the bank vault safes:
- 1 safe: 011
- 2 safe: 235
- 3 safe: 813
- 4 safe: opens with keys (skip 3 digits)
- 5 safe: 455
- 6 safe: 891

Now the safes are open and all their contents are yours. What will you find in them:
- 1 safe belongs to Jindosh, who created the sentry soldiers, inside you will find a note with a voice code that allows you to subdue the sentry soldiers.
- 2nd safe: 30 coins and a black amulet. Where to find the rest of the amulets, read here.
- 3 safe: 150 coins
- 5 safe: 90 coins
- 6 safe: 60 coins.
Mission 5 "There's a Hole in the World"
Safe Malchiodi
Malchiodi's room is located in the Northern Shindeyri Mine in the residential section, which is located just before you enter the library. The room is locked, so you can get there only after you penetrate into the Abyss through the Eye of the Dead God. The first thing you will see in the Abyss will be the corpse of Malchiodi, from whom you must take the key to his room.
I like 14
In this article you will find a complete guide to safes that will help you open them all in this add-on
Other guides:
- Dishonored: Death of the Outsider. Code from safe haven bank and Fibonacci
- Dishonored: Death of the Outsider. First mission contracts
- Dishonored: Death of the Outsider. Contracts in the second mission
IN Dishonored: Death of the Outsider Most safes have a combination lock if they contain valuable items. Some doors also require a combination. Most of these codes are randomized on each playthrough and will be different for each player. Codes can be found while exploring the game world. Several safes have fixed combination locks, such as the bank vault in the third mission for the "Obsessive Safe-cracker" achievement.
In this guide, I will tell you where to find all the combinations for doors and safes.
Mission 1 - Last Stand (1 safe)
The only safe for this mission is in the bookmaker's apartment across the street from the Albarca Baths. You can crawl through the window above the guards near the docks, or you can go through the main entrance to the street from the Albarca baths using the key that can be found in the bucket.
- In the baths, be sure to search the bookmaker to get the key to open the safe. The note reminds the bookmaker that if he forgets the combination, he can put the books on the table. At first, you might think that the number of wins and losses is the code to the safe, but the code is the books. Count the number of books in each section and thereby find out the combination to the safe. Combination: 451.
Mission 2 - Following the Ink Trail (1 door, 2 safes)
- The first lock you come across in the second mission will be on a regular door that leads to the back room of the black market. To get inside, break the wooden "Report All Thefts" sign that is located to the right of the notice board. There will be a grate you can use until you're in the back room, then go right. On the wall next to the door there will be a board with the required combination. I want to warn you that if you open the door and the seller sees you behind the counter, then you will be denied access to updates from him, and they are much more valuable than any of the items that can be stolen from there.
- The first safe is in Christopher George's office. George's office is the very first building on your left as you walk up the stairs to the courtyard. When you enter, you will see two lifeless bodies. Talk to him in his office and receive an optional mission. Complete this mission by stealing or removing Jacobi's key, visit his office and check the painting behind the desk. There will be a vial of blood and a notebook that describes the process of collecting blood from the victim. Bring this evidence to George and he will give you the combination to the safe.
- The second safe is located in Shan Yun's house. To open it you will need an audiogram, which is located in a safe place on the second floor of the Yun House. The floor in this area will be electrical, so you will need to turn it off before attempting to access the audiogram. Take the key from one of the servants in the kitchen, on the first floor, then use the lift to the second floor, where there is a whale oil generator. Turn it off and the electrified floor will disappear. Go up to the third floor and use the audiogram on the player next to the safe and it will open.
Mission 3 - Bank Robbery (3 regular safes and 6 safes in the main vault)
All safes (and locks) in this mission are located in Dolores Michaels Bank. Three locks are located in the archives section in the basement of the Inner Atrium.
- Christopher George's Locker - Find the code on the crumpled note on the floor ("In the Event of My Death") next to Ruby Campos' desk on the third floor. Combination: 379.
- Morgan U's cell. In one of the contracts you will notice in the description that Morgan had 315 coins and this number is the combination to the safe. Fact: Morgan Yu was the main character in one of the previous Arkane games, Prey, and the number 315 is related to March 15th. This is exactly the day that was repeated at the beginning of the game. Be careful, it may turn out that a mimic is sitting in the cell.
- Luigi Galvani's cell - there will be two separate documents here that will help solve this mystery. The first document indicates that the numbers in the code are a reference to the most important day of his life. The second document can be found in several places in the game, including on the bottom floor of the bunk beds near the airlocks. In the book, he talks about his meeting with the notorious Anton Sokolov on the twenty-eighth day of the month of Cold. Not knowing what month this event took place, I entered 28 and turned the dial until it reached the number 7 and the lock opened. Combination: 287. Fact: This combination was also the code to the safe in Dr. Galvani's house in the original Dishonored.
- Main Bank Vault - There are six safes in the main vault. One of the safes is opened using the keys that you received as you progress through the story. The remaining five safes have fixed codes that remain the same every time you access them. On the third floor of the lobby is a board with a Golden Spiral chart (Google it) and a note containing safe combinations based on a mathematical sequence called the Jindosh sequence. The sequence on the board is: 0,1,1,2,3,5,8,13. This sequence is very similar to Fibonacci numbers. In this sequence, the last number is added to the number before it, so after 13 there are 21 (8+13), 34 (21+13), then 55, 89, 144 and so on. There are six safes in the vault and each of them has a three-digit code. Use the sequence in the correct order and get the following combinations: 011 - 235 - 813 - 213 - 455 - 891. But there is one trick in the game that you need to know about. To further advance the story, skip the safe with the keys and do not open it. The correct sequence is: 011 - 235 - 813 - (skip the safe with keys) - 455 - 891.
Fifth mission - There is a gaping hole in the world (1 safe)
- Malchiodi Safe - There will only be one safe in the fifth mission. It can be found during the optional quest. The combination is very easy to find. The symbols located on the wall and combined with the safe will help us here. Combination: 962.